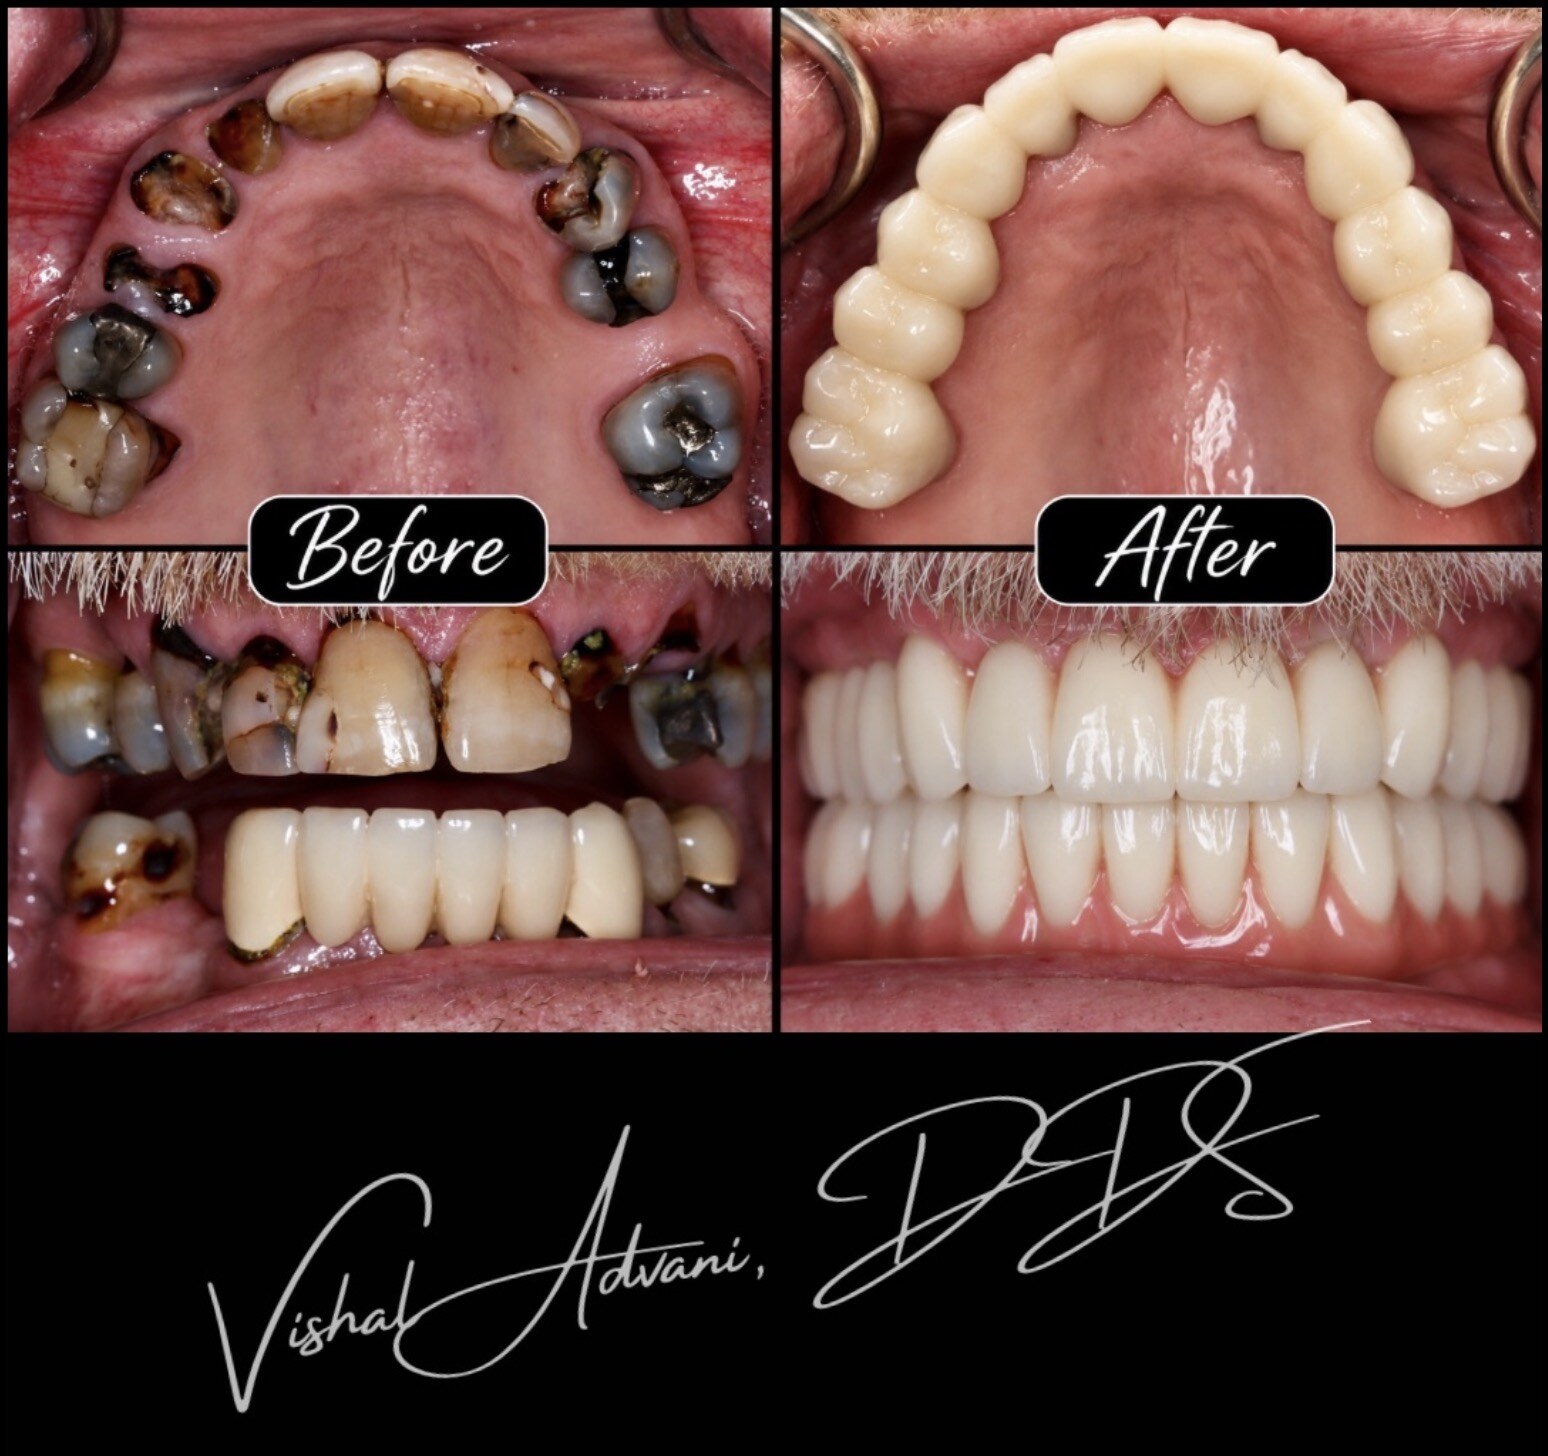
Advanced full-mouth dental implants designed to look like teeth emerging naturally from your own gums. No bulky pink prosthetic gums when you're a candidate — just a smile that looks like it was always yours.
Most full-mouth implant bridges include a strip of pink acrylic or ceramic gum built into the prosthesis. It's there for a reason — to hide the gap where your natural gum used to be before the teeth were lost. For most patients, it's the only option.
The Advani A6™ is our protocol for patients where it isn't. When your bone and gum tissue can be preserved from the moment the first tooth is removed, we can anchor your new teeth so they appear to grow out of your own natural gum — no pink prosthetic band, no visible transition line. Just teeth.
"A6™" stands for Advani and the six implants per arch that anchor the bridge. Six — not four — gives the restoration more stability under bite force, more redundancy if any single implant has an issue over the years, and more options for positioning each implant exactly where your anatomy allows a true FP1 result.
Every step of the A6™ is built around a single goal: giving you new teeth that look like they grew out of your own gums. Here's how we get there — all in one surgical visit for most patients.
The moment a tooth comes out, your body starts reabsorbing the bone and gum that supported it. If we lose that tissue, your new teeth can't emerge naturally — the gap has to be filled with pink prosthetic. Every A6™ begins with techniques to stop that tissue loss before it starts.
Six implants per arch are placed in positions chosen to support natural tooth emergence — not just to hold the bridge up. More implants mean more bite force, more redundancy, and more flexibility in positioning them where your anatomy allows a true FP1 result.
If your upper jaw has lost significant bone, we anchor some of the implants into the pterygoid region or cheekbone (zygoma) — bypassing the areas where bone is missing. This avoids months of grafting and lets us complete your reconstruction in a single visit.
Depending on which teeth are being removed and what the roots look like on CBCT, we may use partial extraction therapy (socket shield), root submergence, or a connective tissue graft. Each one protects a different part of your natural gum architecture.
Before you leave the surgical visit, a full-arch temporary bridge is 3D-printed in-office and attached to your implants. You walk out with a complete smile the same day. The temporary is also shaped to guide your gums into healing in the exact contour we need for the final bridge.
Over the next 3–4 months, your gums heal around the temporary bridge — gradually shaped by its contour. By the time you come back for the final, your tissue has matured into the exact position needed for a seamless FP1 emergence.
To design the final bridge, we capture the exact position of your implants and tissue using MicronMapper photogrammetry — precision-calibrated optical measurement, far more accurate than any impression material. This is what makes the final bridge fit without strain.
Dr. Advani designs your final bridge in-office, and it is milled on our 5-axis mill from a solid block of zirconia. The result: a full-arch restoration where the teeth emerge from your own natural gum, with no pink prosthetic material and no visible transition — the signature A6™ outcome.
An A6™ can't be planned by eye. The margin for error — the millimeter difference between natural tooth emergence and a visible transition line — is too small. Every A6™ case is planned in Blue Sky Plan, which uses your 3D CT scan to map every implant's position, depth, and angle. Then the case is planned a second time, independently, in X-Guide — the planning platform for our X-Nav surgical navigation system.
Double the planning, in the two most advanced implant planning platforms available — both using AI to help identify your anatomy and check implant trajectories. If the two plans agree, we operate. If they diverge, we figure out why before the drill ever touches bone. During surgery, the plan is carried out with X-Nav dynamic navigation — the same technology used in neurosurgery — verified live and accurate to within fractions of a millimeter.
The Advani A6™ is completed in a single surgical visit, followed by a 3–4 month healing window before your final zirconia bridge is delivered. Here's exactly what to expect at each stage.
A cone-beam CT captures your bone volume, sinus position, nerve anatomy, and remaining tooth structure. The case is then planned independently in two AI-driven platforms — Blue Sky Plan and X-Guide — mapping each implant's position, angle, and depth, and identifying exactly how much bone can be preserved to support a true FP1 result. A 3D model of your jaw is printed so the surgery can be rehearsed before you sit in the chair.
Under IV sedation, all remaining teeth in the arch are removed and the ridge is precisely contoured — enough to seat the bridge, but no more, so your natural gum architecture stays intact. Four to six implants are placed using X-Nav dynamic navigation, following the digital plan exactly. Multi-unit abutments are connected and the arch is prepared to receive the temporary bridge.
A full-arch temporary bridge is 3D-printed in-office and screwed directly onto the implants the same visit. You leave with a complete smile in place — designed to support the gum tissue as it heals and guide it into the precise contour planned for your final bridge.
Over the next three to four months, the implants osseointegrate with the bone while your gum tissue heals and matures around the temporary bridge. A soft-food diet is recommended during this window. Routine check-ins monitor healing, tissue health, and the settling of the gum line into its final position.
Photogrammetry and intraoral scanning capture the exact implant positions and the mature tissue contour. Dr. Advani designs the final zirconia bridge in-office and it is milled on our 5-axis mill on site. The result: a full-arch restoration where the teeth emerge from your own natural gum, with no pink prosthetic material, no visible metal, and no waiting on an outside lab.
Not everyone qualifies for the A6™. A true FP1 result requires enough bone and gum tissue to support teeth that emerge naturally — and that depends on your current anatomy, when your teeth were lost, and the condition of what remains. A CBCT scan is the only way to know for sure, but these are the patterns we see most often in A6™ candidates:
The best A6™ candidates still have most of their teeth — even if they're loose, decayed, or periodontally compromised. We can preserve the gum and bone architecture at the moment of extraction before any of it is lost.
If your smile shows significant gum when you smile fully, you have the most to gain from an A6™. A standard FP3 bridge would show its pink prosthetic transition line in exactly the area you don't want to see it.
The CBCT scan shows us whether you have enough bone volume to seat 6 implants in positions that support natural tooth emergence. Where bone is thin in one area, we can often use remote anchorage (pterygoid or zygomatic implants) to bypass it.
Any full-arch bridge gives you teeth again. The A6™ gives you teeth that still look like your own 10, 15, 20 years later — because we preserved the natural foundation from day one, rather than hiding its absence behind pink prosthetic.
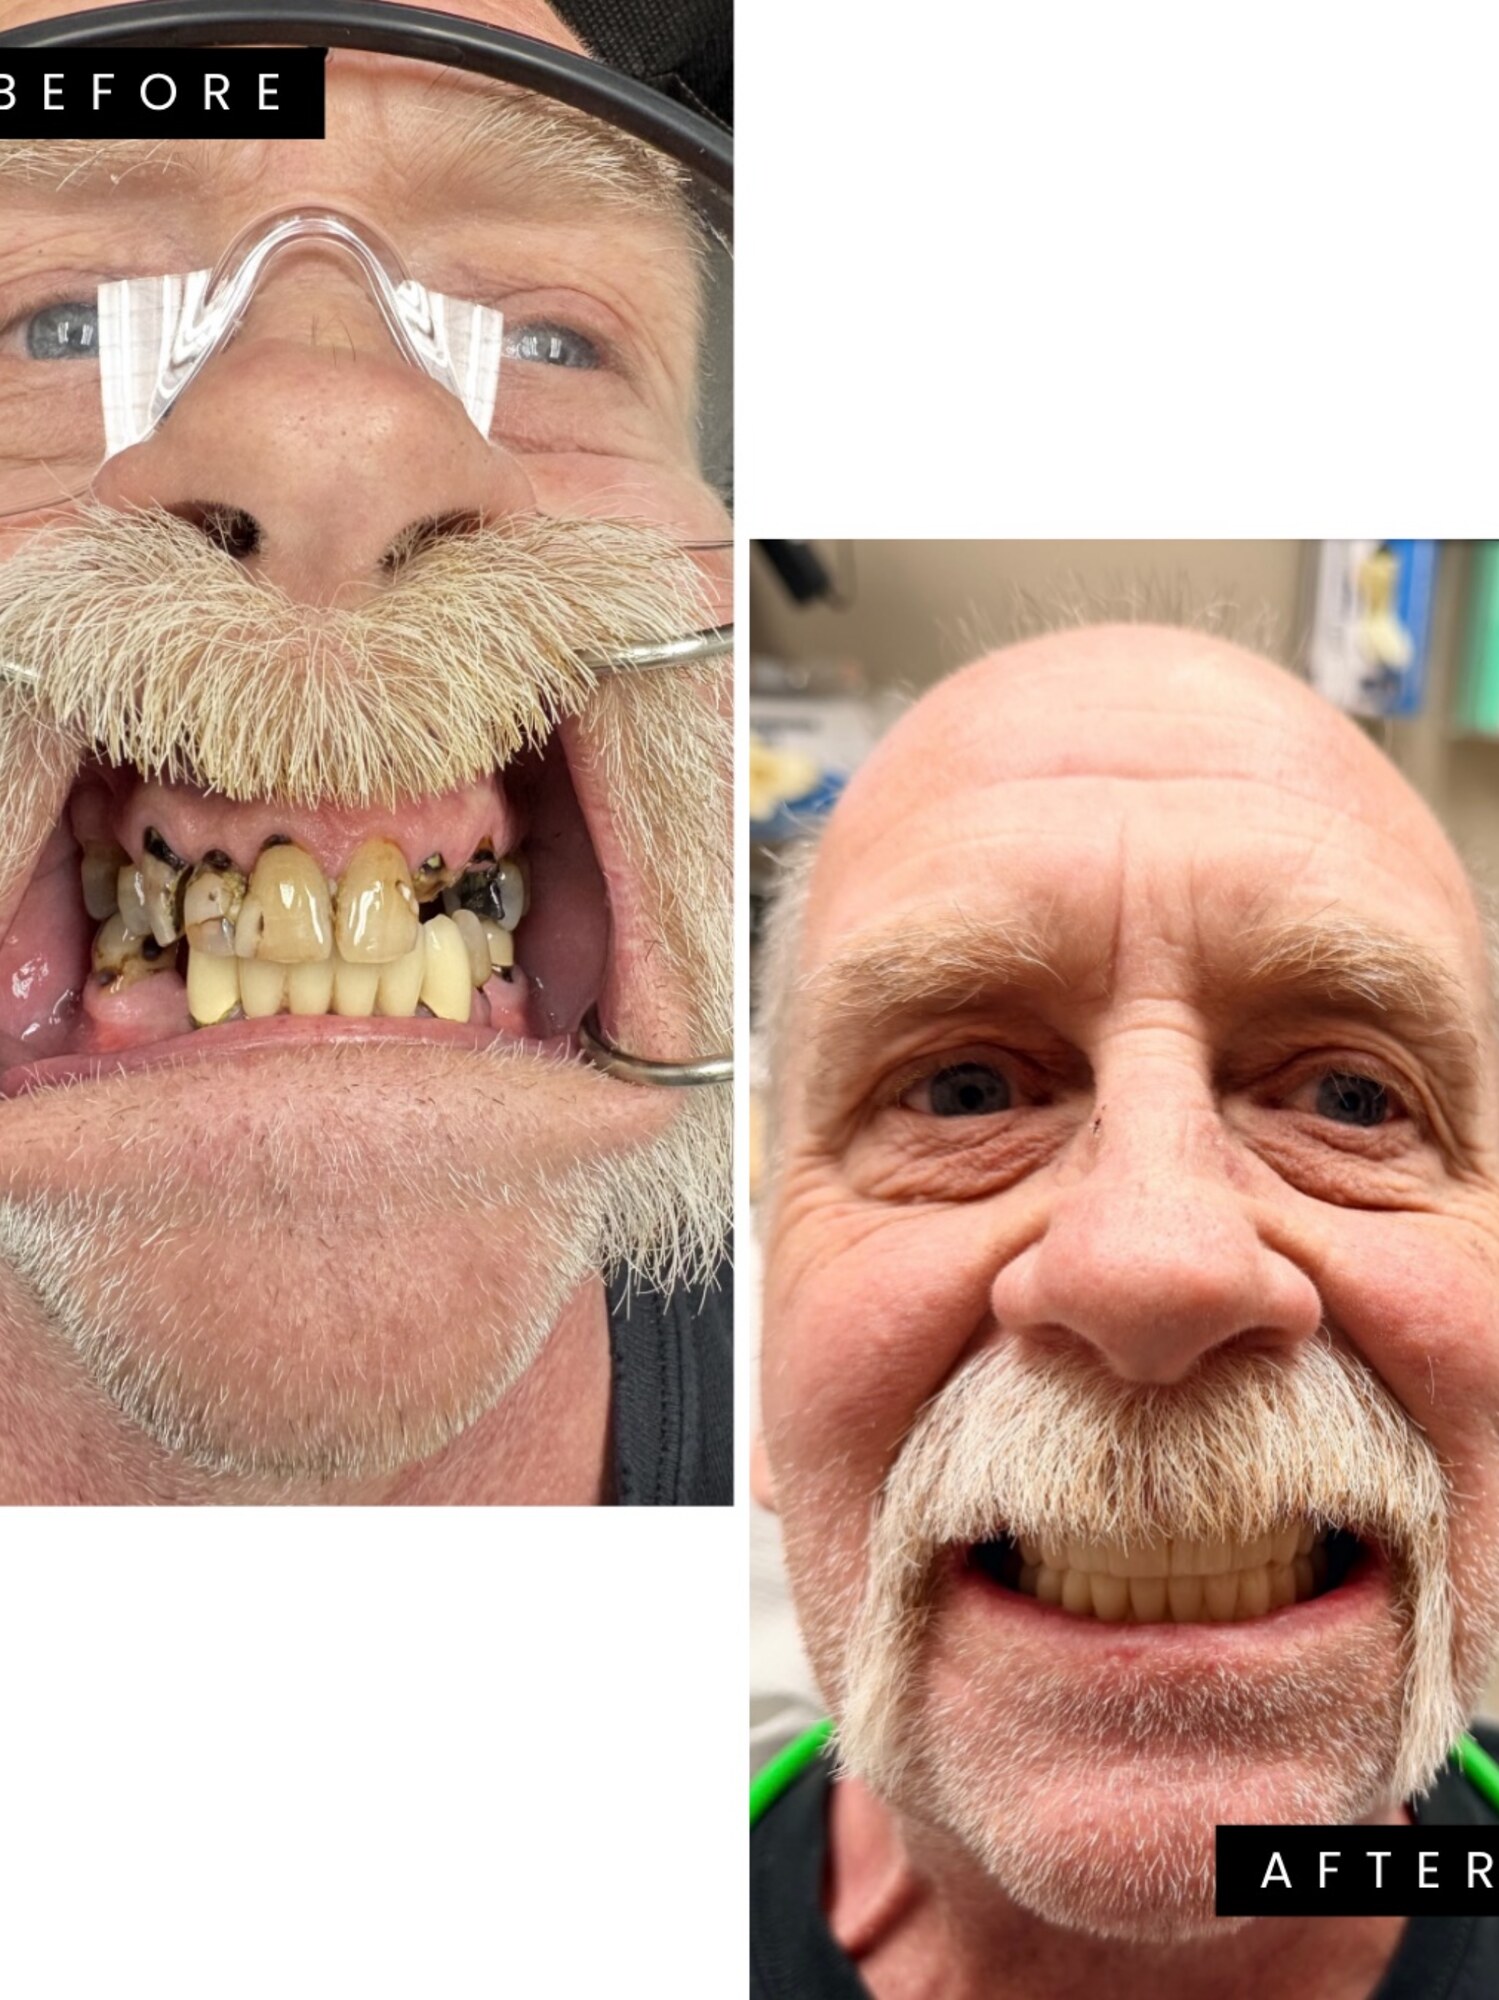
David's teeth kept breaking. In one visit he got 12 implants placed with 3D navigation, fixed teeth the same day, and an upper Advani A6™ bridge with no fake gums.
Read David's Story
A complimentary consultation includes a 3D CT scan, a digital planning preview showing what your result could look like, and a transparent treatment plan. You'll know exactly what's possible for your case — and what it costs — before you decide anything.